In this article, we’ll look at how to quickly prep a published dungeon in Obsidian. By the end, you’ll have a visual of your map along with notes for keyed locations. Let’s roll.
The map and adventure seen in the screenshots of this article are from Trial of the Slime Lord by Jordan Rudd and Winter’s Daughter by Gavin Norman.
Set Up the Plugin
If you haven’t already, follow the basic map guide to install and enable the Leaflet plugin. You can skip the optimizations and the rest of that guide.
Create the Map
Add the image file of the map to your vault. Use this code block in a new note to create the map. Adjust the id and image parameters to reflect your map image. Tinker with any of the other parameters as you see fit.
```leaflet
id: trial-slime-lord
image: [[trialoftheslimelord_-_dm.png]]
height: 900px
width: 95%
minZoom:5
maxZoom: 10
zoomDelta: .5
defaultZoom: 7
scale: 12
```
Key the Map
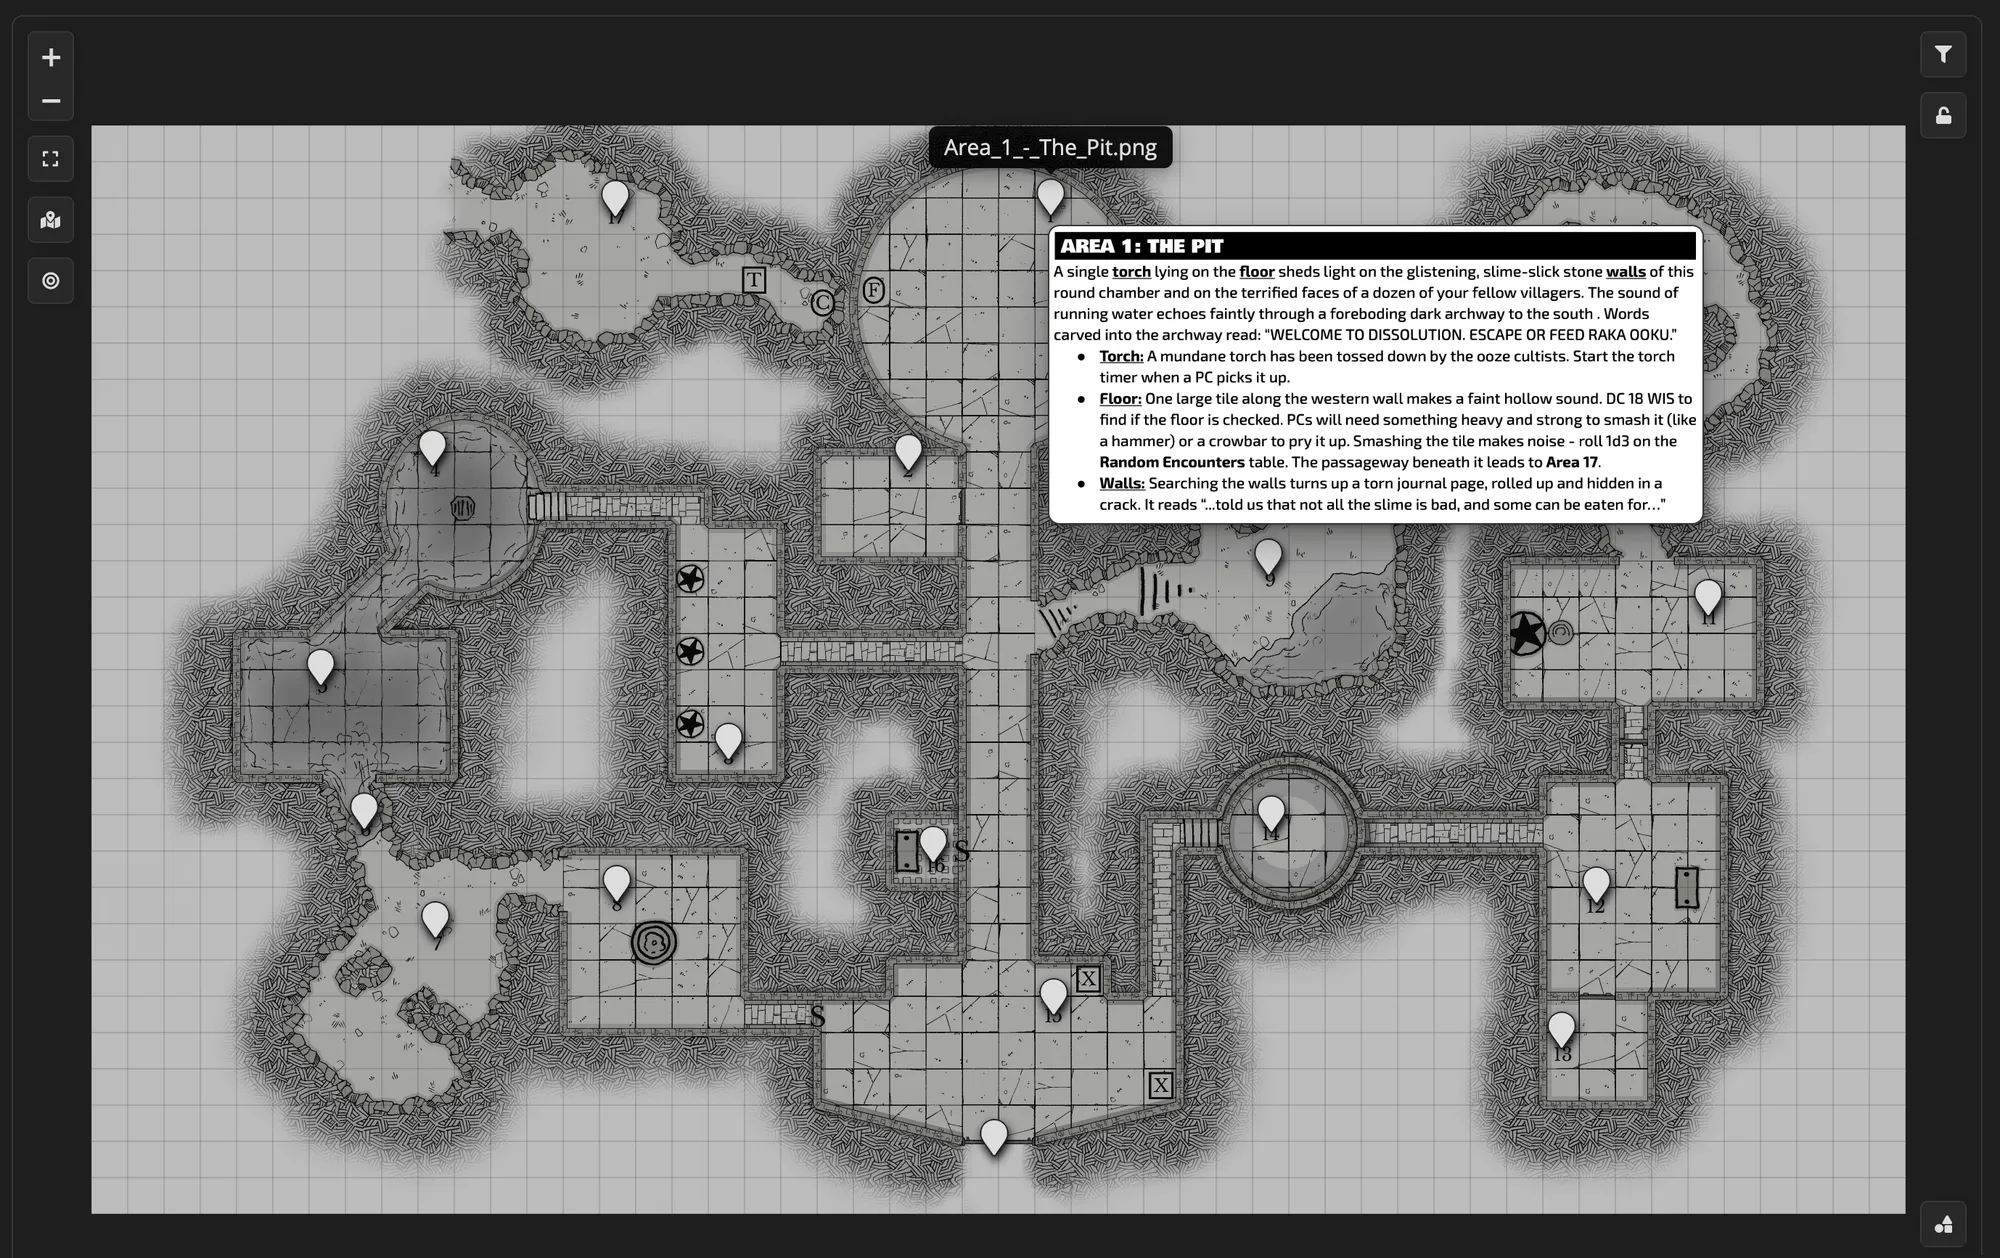
Right-click on the rendered map to add markers for each room or keyed location in your dungeon.
Link Your Notes
Now for the ✨ magic. If you’re prepping from a digital source, simply grab screenshots for each keyed location in the adventure. Add them to your vault. If you’re prepping with a physical book, take a picture of each keyed location and add them to your vault.
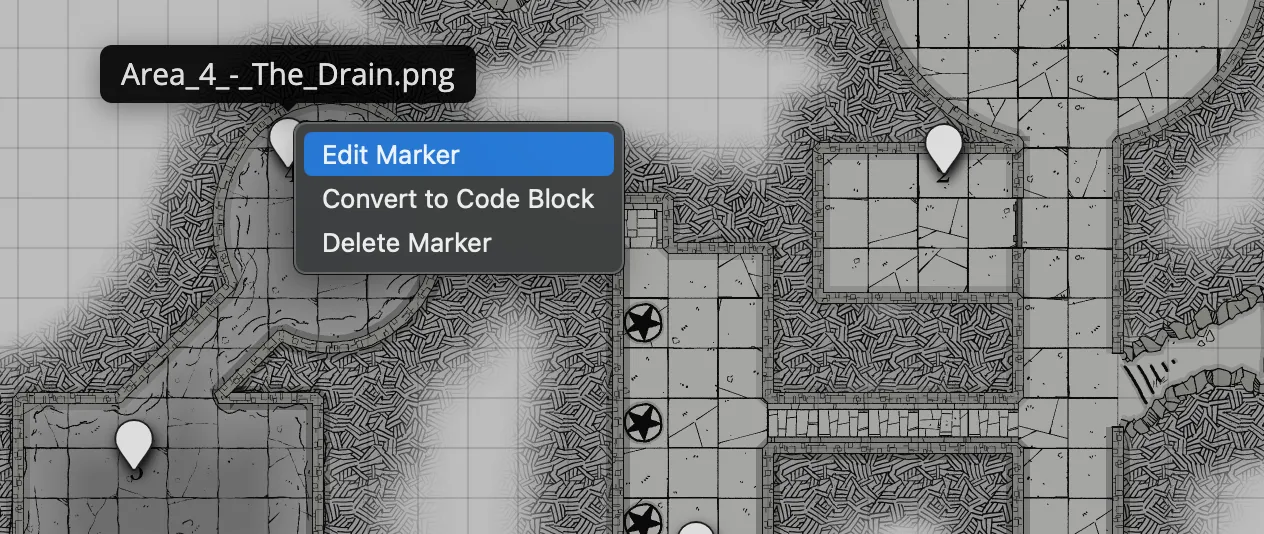
Right-click on a marker and click Edit Marker. Edit the Note to Open to link to the associated image. Don’t forget to add the image’s file extension (the plugin will leave it out).
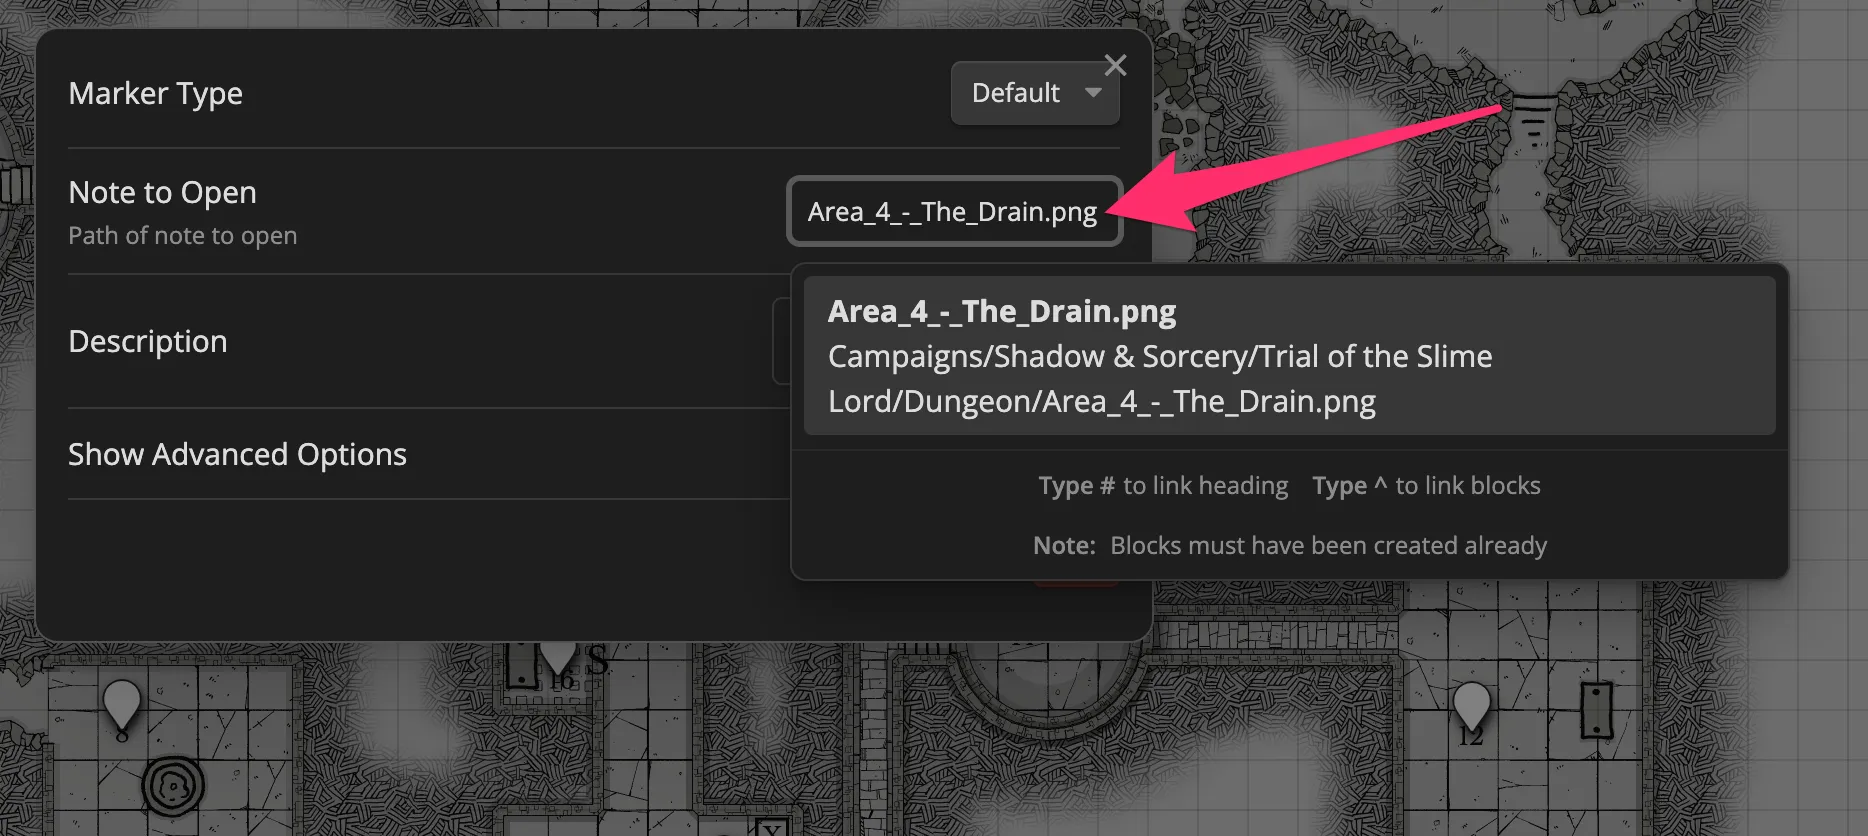
Under Edit Marker > Show Advanced Options, make sure that Display Tooltip is set to Hover. This will let you see previews of each location by just hovering over the map marker.
Bonus: Link PDF Pages
Take it a step further by linking directly to the PDFs (and specific pages!) right within your vault. For the Note to Open field, choose the PDF, add the file extension, and use the following syntax to link to a specific page: #page=.
So if they keyed location on your map is described on page 19 of your adventure’s PDF, your Note to Open would look like: adventure.pdf#page=19.

That’s it! Now you’ve got a quick and dirty dungeon map with all of your notes tied to the keyed locations.
Game on.