Creating a Basic Interactive Map in Obsidian
Get notified about new articles and receive downloads for PhD20's Adventure Design Document and Obsidian TTRPG Vault Template.
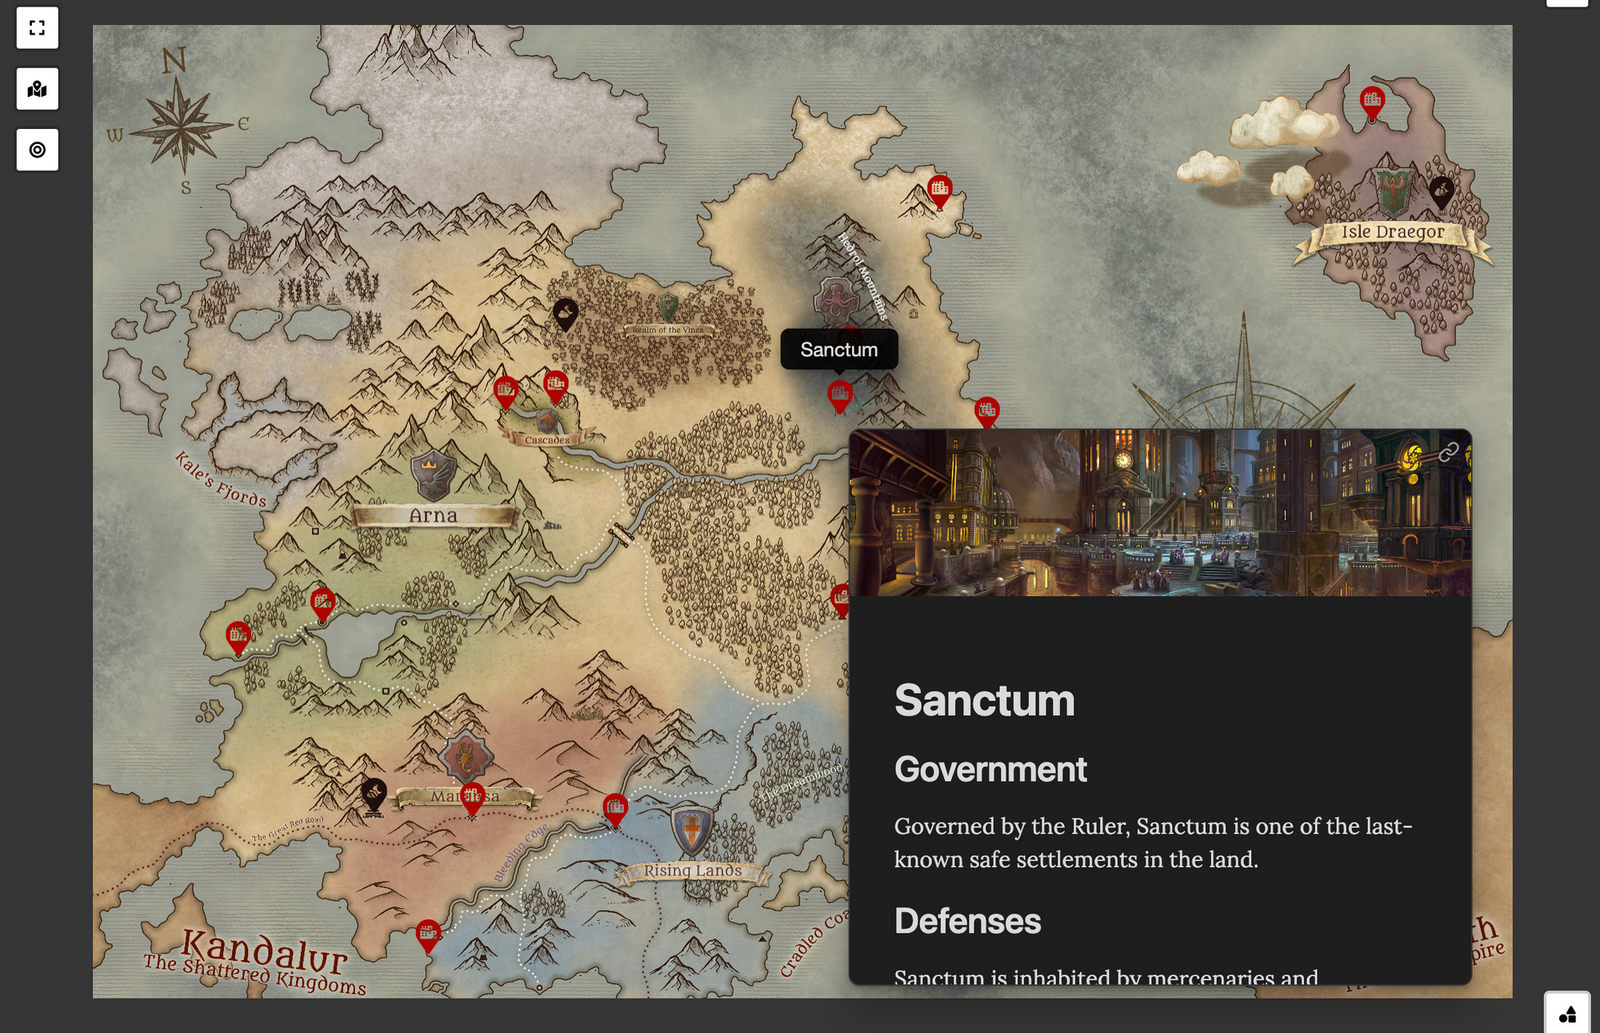
Powerful TTRPG campaign managers allow you to upload high-resolution maps, place markers, and link those markers to more information. Obsidian is no different. Let’s look at how to set up an interactive map for Dungeons & Dragons using Obsidian.
Obsidian’s learning curve is as steep as you want it to be. Getting started is simple. More advanced features require more research and setup. The plugin we’ll look at in this article is quite robust. The learning curve looks steep. I will try to flatten it, one feature at a time. Let’s look at setting up an interactive map where you can add markers and link them to your notes.
To do this, we’ll look at the Obsidian Leaflet plugin.
“Adds interactable mapping functionality to Obsidian.md, using Leaflet.js.”
Install and Enable
- Go to Settings > Community Plugins
- Turn off Restricted mode
- Click Browse and type in the name of the plugin
- Install and enable that plugin
Add the Code Block
Once enabled you can add the following code block to any note to render a map. This is the simplest implementation.
```leaflet
id: ezaros-world-region
image: [[map-ezaros-world-region.png]]
```
The id needs to be unique (no other maps with the same one). The image is just a link to an image file in your vault. At this point, you should have a working map in the reader view for the note. You could stop here with configuring your map. But I wouldn’t recommend it. Before we dive deeper and start adding markers, let’s optimize our map.
Optimize Your Map
Warning: Be sure to add the image bounds before adding markers as existing markers may not update afterward.
Defining the bounds of your image will let Obsidian know exactly how big it is and allow you to measure distances on the map accurately. Here’s what the code block looks like with bounds:
```leaflet
id: ezaros-world-region
image: [[map-ezaros-world-region.png]]
bounds:
    - [<top-left-latitude>, <top-left-longitude>]
    - [<bottom-right-latitude>, <bottom-right-longitude>]
```
Calculating bounds isn’t terribly straightforward but I’ve put together a little tool to help with that. You can dive a lot deeper into this (and many others have) but my goal is just to get you up and running as easily as possible. To do so, set your top left latitude and longitude to 0. For the bottom right, we’ll use this calculator.
Go to File > Make a copy and then start adding the following:
Map Dimensions are simply the height and width of your image file in pixels.
Distance Dimension is what allows us to accurately measure distances later on. In short, you need an example of the correct distance between two points on your map and how many pixels in length that is.
Find two points that you know the distance between. For example, if you know that a specific coastline is 50 miles long, enter 50 as the # of Units (miles, kilometers, etc. don’t matter here). Then measure the distance in pixels between those two points on the image file. You can do this with most image applications, like Preview on Mac. For my example, the coastline was about 200 pixels long. So I entered 200 as the Distance (in px) value.
That’s it. The tool should now display the correct values for your bottom right latitude and longitude. Add those to the code block in Obsidian. My block would now look like this:
```leaflet
id: ezaros-world-region
image: [[map-ezaros-world-region.png]]
bounds:
    - [0, 0]
    - [192, 256]
```
If you’ve set this up correctly, you can now measure distances on your map. Press shift and click somewhere on the map. As you move your cursor around, you should see a measurement. If the units of measurement are wrong, you can override it by adding the unit option:
```leaflet
id: ezaros-world-region
image: [[map-ezaros-world-region.png]]
bounds:
    - [0, 0]
    - [192, 256]
unit: miles
```
Zoom
There are a handful of options to consider when trying to improve map zooming.
The lat and long options tell the map where to display when initially loading. I like my map centered, so I’ll need half of the bottom-right bounds we calculated above. In my case that would be 96 and 128.
The minZoom and maxZoom set the minimum and maximum zoom values. The map will load at the defaultZoom level we set. Lastly, the zoomDelta allows us to configure how much the zoom level changes by when zooming in or out. Play around with these settings until you’re satisfied. Here’s what mine looks like:
```leaflet
id: ezaros-world-region
image: [[map-ezaros-world-region.png]]
bounds:
 - [0,0]
 - [192,256]
unit: miles
lat: 96
long: 128
minZoom: 1
maxZoom: 10
defaultZoom: 1.5
zoomDelta: 0.5
```
Add Markers
Finally, let’s look at how to add markers. These identify important points on your map. You can customize how these markers look and link them to other notes in your vault. I’m going to look at two ways you can add markers.
Using Map Tools
The simplest way is using map tools. You can right-click anywhere on the map to add a marker. Right-click on that marker to edit, link to a note, and more. Adding markers this way will save them to a file located here:
your-vault/.obsidian/plugins/obsidian-leaflet-plugin/data.json
Using Marker Files
Another way is to use the markerFile option. This option tells the map to look at specific files for marker information. For example, I have a settlement defined in a file called Oracle.md. That file’s frontmatter looks like this:
---
location: [120.6259765625, 95.875]
mapmarker: default
---
Location is the coordinates for the marker on your map.
Mapmarker is the type of marker you want to use. You can define and customize these in the plugin’s settings tab. For example, you might have separate markers for cities, ruins, or events.
Back in my map’s configuration, I can add the markerFile option to include Oracle.md.
```leaflet
id: ezaros-world-region
image: [[map-ezaros-world-region.png]]
bounds:
 - [0,0]
 - [192,256]
unit: miles
lat: 96
long: 128
minZoom: 1
maxZoom: 10
defaultZoom: 1.5
zoomDelta: 0.5
markerFile:
 - [[Oracle]]
```
And just like that, my map will include a marker linked to the Oracle.md note!
By now, you should have a functioning map—it loads and zooms the way you want, measures distances accurately, and accepts markers that can link to other notes. Someday, I might write a follow-up on the advanced features of the plugin—things like drawings and image overlays (map layers). But for now, this basic set of functionality should serve most TTRPG needs.